Monday, April 9, 2012

Black Bean Enchiladas

This dish is deserving of a recipe card.  It's already got a reservation in my "Make This Again" file.  Simple, easy to adapt to your family's tastes, can be made in the oven or the crock pot, and so yummy!

Here's how to home-make it:  (Do it soon!)

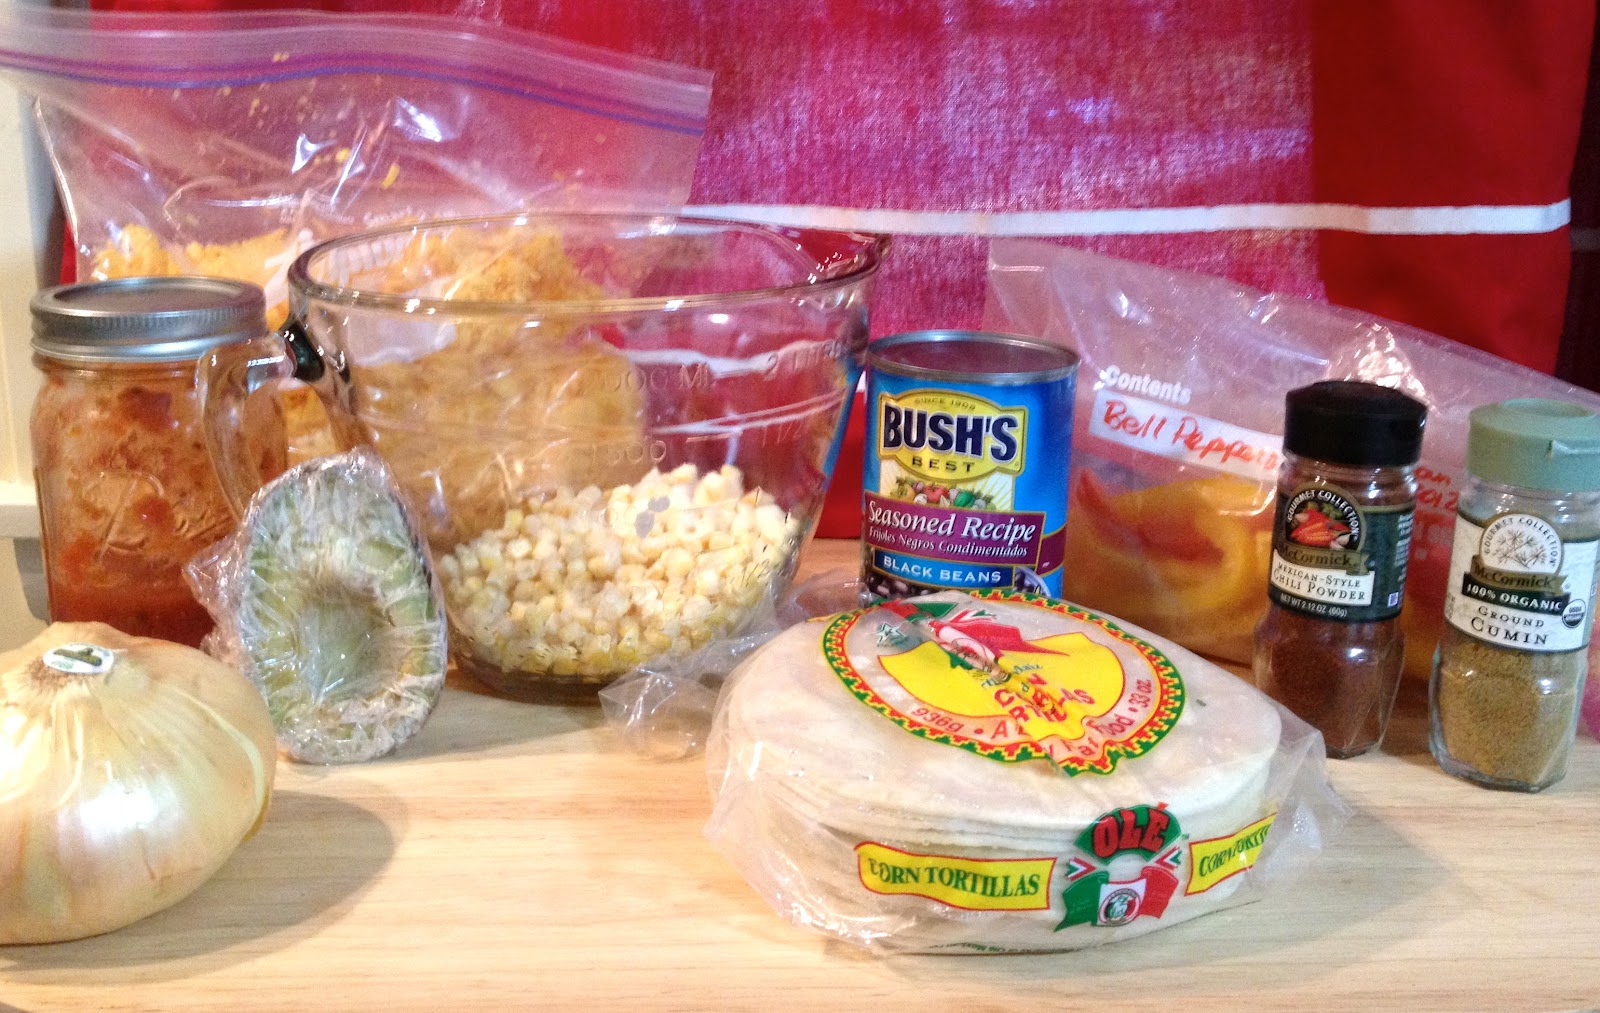
- 1 can black beans, drained and rinsed
- 1 1/2 cup frozen corn kernels
- 1 small yellow onion, finely diced
- 1/2 cup diced bell pepper
- 1 tsp chili powder
- 1 tsp cumin
- 1 tsp salt
- 1 tsp fresh cilantro, chopped
- 1 1/2 cups shredded cheddar cheese (divided)
- 2 cups salsa (divided)
- 12 corn tortillas

In a large bowl, combine beans, corn, onion, bell pepper, chili powder, cumin, salt, cilantro, and 1/2 cup of cheese. Stir to combine.  (At this point, you can store this mixture in the fridge for several days before making the enchiladas).

For crock pot: Lightly coat inside of crock pot with cooking spray. Cover the bottom of your crock pot with a thin layer of salsa.  Fill each tortilla with several spoonfuls of the bean mixture.  Fold up and arrange in crock pot with seam-side down.  If you need to layer them, spread some more salsa in between layers of tortillas. Cook on high for 2-4 hours.  When only 30 minutes remain, sprinkle remaining cheese on top and place lid back on crock pot.

For oven: For easy cleanup, line a 13x9 baking dish with foil, and lightly coat with cooking spray.  Cover the bottom of your dish with a thin layer of salsa.  Fill each tortilla with several spoonfuls of the bean mixture.  Fold up and arrange in dish with seam-side down.  Cover dish with foil, and bake at 400'F for 20 minutes.  Then, remove foil, and sprinkle on remaining cheese.  Bake an additional 10 minutes or until cheese is bubbly.

Serve enchiladas with homemade ranch (see previous post!), avocado, sour cream, greek yogurt, or your choice of sides.  Make it your own!  Add a cup of chopped chicken, use pepper jack instead of cheddar, leave out the cilantro if it's not your taste, or whatever.  That's the beauty of home-making it!

Tuesday, April 3, 2012

No-rinse Floor Cleaner

Another addition to my homemade spray-cleaning arsenal is no-rinse floor cleaner, and it's definitely one of my favorites.  I'd been using a Clorox ReadyMop, which I was pleased with.  I like the idea of getting a clean mopping pad each time instead of letting it sit in between uses (ask me about my fear of sponges sometime...although I might throw up in my mouth a little).

But you can use this no-rinse floor spray with any mop.  Refill your ReadyMop/Swiffer bottle with it, make a large quantity of it in a bucket or the sink to use with a traditional mop, or put it in a spray bottle to squirt on the floor with a reusable (washable) microfiber mop head.  (All of these options are available at Wal-Mart, Target, etc.)  One advantage of the spray bottle option is that it can be used just as easily for a spot-clean as it can to spray down the whole kitchen floor.

And it's so much less expensive than what I was buying to the tune of almost $4/bottle.  The home-made version ends up being just pennies a bottle...almost nothing for me since I always keep the ingredients on hand.  And that's another plus, you can always whip up a quick batch when you need some.  In fact,  that's how this came to be as I emptied my store-bought bottle on a kitchen full of muddy paw prints.

Want to try it for yourself?  Here's how to home-make it:

- 1 Tbs white vinegar
- 3 drops essential oil (any scent, I used tee tree oil)
- 32 oz hot tap water in a spray bottle
(You can also fill up your sink with hot water, add 1/3 cup vinegar and 8-10 drops essential oil.)

Then just spritz it on the floor as you go.  It dries relatively quickly, so I just squirted down one strip of tile at time.  If you come across a really dirty spot, you can always give it an extra squirt and let it sit while you do the next strip of floor.  Everything on my floor came off using this with my washable microfiber cloth mop.

You can smell the vinegar when you first spray it out, but that scent dissipates as soon as it dries leaving behind only the light essential oil scent.

And that's it!  No rinsing, no residue, no dirt...well, for a few minutes anyway!


Sunday, April 1, 2012

Spread 'Em! Chicken

As promised, here's the recipe for that yummy spread I talked about in my last post!  I've made this a few times now, and it never disappoints.  It's great because it's made with ingredients I almost always have on hand, takes about 5 minutes to prepare, and even tastes great as leftovers.

I've played around with several lower calorie options, finding that the higher calorie versions browned better in the oven (isn't that always the case?).  But the lower calorie ones still tasted amazing even though they didn't look quite as pretty.

*Here's a little disclaimer on all of my cooking recipes...I rarely measure anything, unless doing some precise baking.  "Eyeballing" it is usually the way I go.  So these measurements aren't meant to be exact...in fact, they're probably not exactly what I used!  Feel free to play around with the amounts and ingredients.  Oh, don't look so worried...it'll be fun!

Here's how to home-make the spread for your chicken:

- 1 cup Greek yogurt or sour cream
- 1/2 cup mayo (regular or reduced fat)
- 1/3 cup grated parmesan cheese (grate your own or the kind from the shaker is fine)
- 2 tsp dried parsely
- 1/2 tsp onion powder
- 1/2 tsp garlic powder
- salt and black pepper to taste

Combine everything in a small bowl, and stir until combined.  (These amounts made enough for me to spread over 2 very large chicken breasts, so make more if you're planning to serve a big group.)  Yep, that's it!  You can even make the spread a few days in advance and store it in the fridge.

When you're ready to cook your chicken, preheat your oven to 375'F.  Grab your frozen or thawed chicken breasts, and slather that spread all over the top.  Lay it on thick, at least a half-inch or so.  You'll be glad you did.

Now, pop the chicken on a foil-lined baking sheet (for easier clean-up later), and cook them until all the pieces are at least 165'F by meat thermometer and the topping is bubbling and brown.  Mine took about 45 minutes with frozen chicken.  (If you know chicken, that would usually be a long time, but don't worry too much about overcooking your birds...the spread keeps them nice and juicy!)

Here's the finished product of the lower-calorie version.  Yes, it's a bit splotchier than it's caloric counterpart, but still mmm-mmm good!  Besides, brown food is good food, right?