Wednesday, May 23, 2012

Fast and Fresh Corn-on-the-Cob

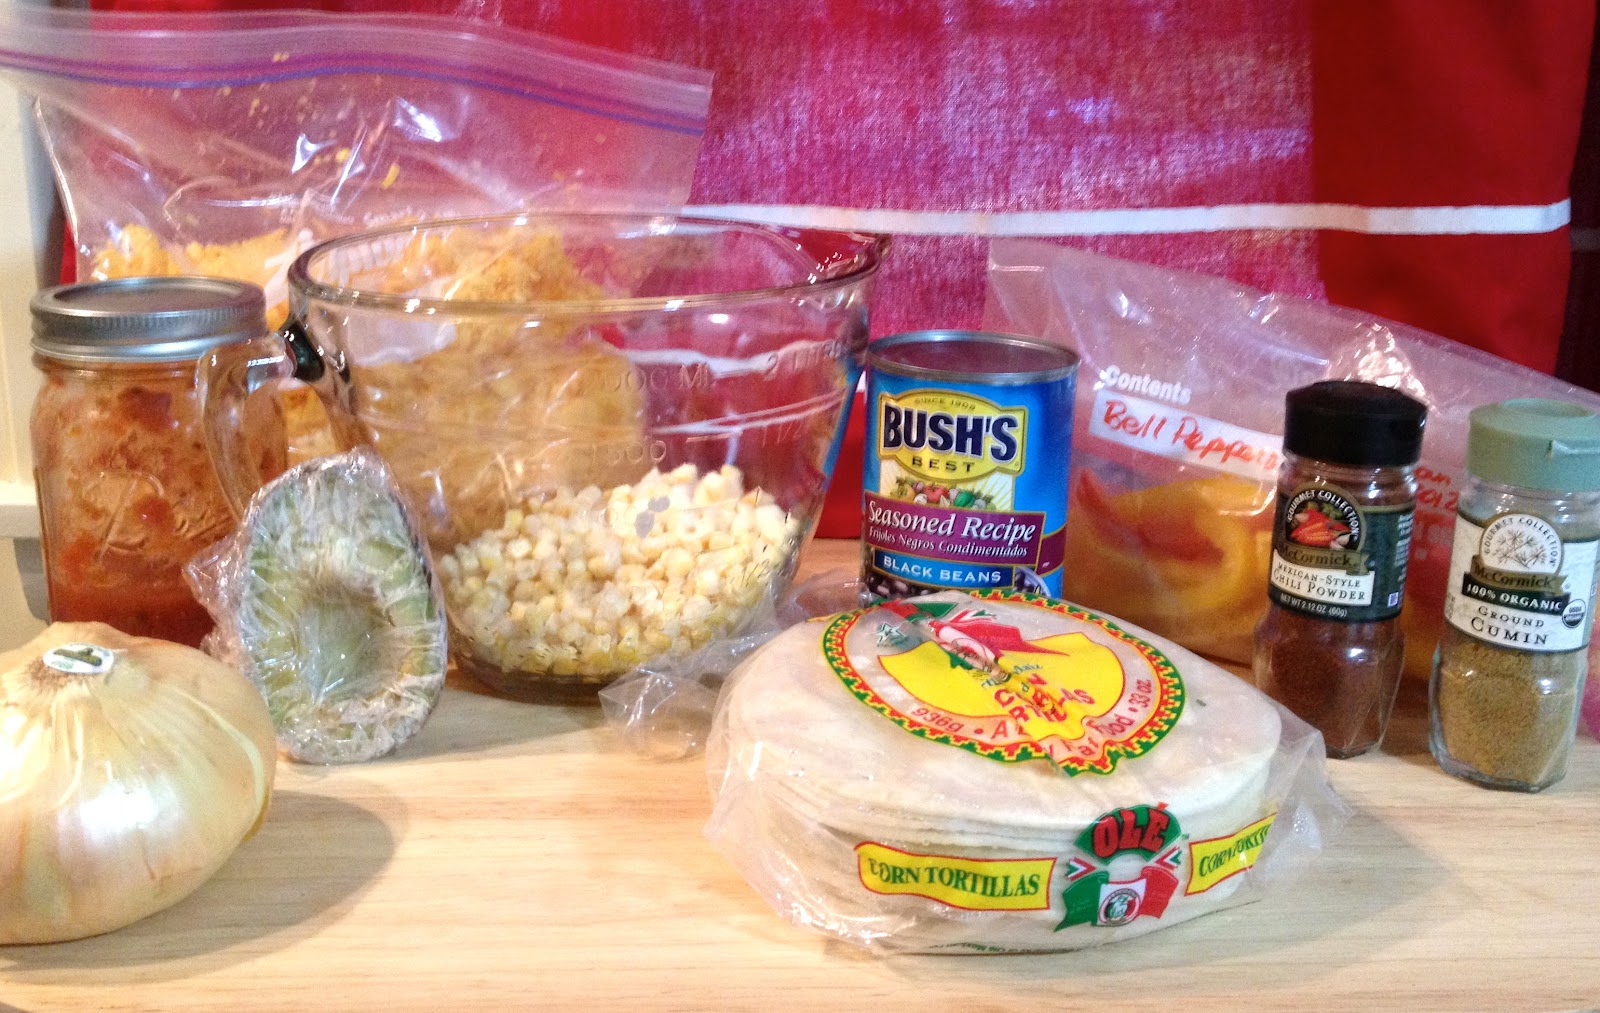
I love fresh corn on the cob...the kind you get at the farmer's roadside stands or local produce shops. While the bags of frozen corn on the cob at the supermarket will do in a pinch, they just can't hold a candle to the fresh, unshucked ears.  It's a summertime staple around here.

The only thing I don't like about corn on the cob is that it's a bit time consuming to prepare.  My mom used the shuck and boil method, but I'm not quite as patient as her.  Grilling is a quicker option, but still takes some prep time to remove the silks so that they don't catch on fire.

So I was still in search of a simple way to cook my fresh corn that didn't take time away from prepping the rest of my dinner.  And I found it.  Quick, easy, and oh so good.  Here's how:


Preheat your oven to 350'F.  Lay your unshucked ears on an ungreased baking sheet.  (No need to prep them in any way!)  Bake them on the middle oven rack for 30 minutes.

(Monitor them closely so that none of the silks are tempted to flame up.  Mine had no problem, and made some of the most delicious, crunchy corn I've ever had.)

And you can leave them in the husks until your ready to plate them up.  They'll stay hot for close to an hour in there.  When you're ready to eat, use a sharp knife to cut the "stem" end off of the corn.  The husks and the silks will then peel off easily.  Coat the corn in butter, salt, and pepper, and start gnawing away...typewriter style!

Sunday, May 20, 2012

Black-and-blue Raspberry Jam


Went berry picking with my Nana this weekend.  Last year we picked peaches, and I still haven't gone through all my jars of peach butter and peach jam.  This year, I wanted a few freezer bags of blueberries for muffins, smoothies, and such.

I'd intended to pick enough raspberries and blackberries to make individual jams, but I succumbed to the sweltering heat before I could get enough. Yet, I still had too many to eat before they went bad.  Some of the blackberries went to PW's black berry cobbler (see pic below), which was absolutely divine!

So what to do with the remaining berries? I started skimming a few cookbooks and ran across a variation of this recipe, tweaking it to my preferences.  Here's how I made my Black-and-blue Raspberry Jam (sorry I forgot the ingredients picture, I get really excited about canning!):

- 3 cups blueberries
- 2 cups blackberries
- 3 cups raspberries
*the exact amounts of each berry don't matter, just make sure you have a total of 8 cups of whatever berries you use
- 2 Tbs. lemon juice
- 2 Tbs. water
- 1 50g-box of fruit pectin
- 5 1/2 cups sugar

Start by boiling your water in your canner pot (mine took about an hour because of how much water the canner holds).  While its coming to a boil, run your jars through dishwasher cycle to sterilize them.  (The recipe mades 3-4 quarts of jam so choose your jar sizes accordingly.) Put another small pot of water on the stove to sterilize your rings and new lids.  Pick through and rinse your berries; pat them dry.

When your canner starts to boil, put your berries, lemon juice, water, and pectin into another large pot.  Give it a gentle stir then bring it to a rapid boil over high heat.  Stir it often.

When the mixture reaches a hard boil (continues to boil even when stirred), add in the sugar.  Stir it constantly.  When the mixture reaches a boil again, cook it for 1 minute.

Begin ladling your mixture into the jars, leaving 1/4 inch of headspace. Keep everything sterile and use good canning technique (if this is new to you, check out the insert in your pectin box or just do a google search).  Put the lids and rings on securely and place all the jars into the boiling water bath.  Submerge for 10 minutes.

Pull the jars out carefully, and set them somewhere to cool.  In a few minutes, you'll hear that beautiful "POP!" that means your jars are sealing.  To protect the seal, try no to move the jars for about 24 hours. Check the seals and place anything not sealed after a few hours into the fridge.  Store the sealed jars for a year or so...if you can keep from eating it that long...it's really yummy!  If you have leftover blackberries, blueberries, and raspberries, I highly recommend this black-and-blue raspberry jam!  Great on toast, biscuits, or a good ole' PB&J.

Monday, April 9, 2012

Black Bean Enchiladas

This dish is deserving of a recipe card.  It's already got a reservation in my "Make This Again" file.  Simple, easy to adapt to your family's tastes, can be made in the oven or the crock pot, and so yummy!

Here's how to home-make it:  (Do it soon!)

- 1 can black beans, drained and rinsed
- 1 1/2 cup frozen corn kernels
- 1 small yellow onion, finely diced
- 1/2 cup diced bell pepper
- 1 tsp chili powder
- 1 tsp cumin
- 1 tsp salt
- 1 tsp fresh cilantro, chopped
- 1 1/2 cups shredded cheddar cheese (divided)
- 2 cups salsa (divided)
- 12 corn tortillas

In a large bowl, combine beans, corn, onion, bell pepper, chili powder, cumin, salt, cilantro, and 1/2 cup of cheese. Stir to combine.  (At this point, you can store this mixture in the fridge for several days before making the enchiladas).

For crock pot: Lightly coat inside of crock pot with cooking spray. Cover the bottom of your crock pot with a thin layer of salsa.  Fill each tortilla with several spoonfuls of the bean mixture.  Fold up and arrange in crock pot with seam-side down.  If you need to layer them, spread some more salsa in between layers of tortillas. Cook on high for 2-4 hours.  When only 30 minutes remain, sprinkle remaining cheese on top and place lid back on crock pot.

For oven: For easy cleanup, line a 13x9 baking dish with foil, and lightly coat with cooking spray.  Cover the bottom of your dish with a thin layer of salsa.  Fill each tortilla with several spoonfuls of the bean mixture.  Fold up and arrange in dish with seam-side down.  Cover dish with foil, and bake at 400'F for 20 minutes.  Then, remove foil, and sprinkle on remaining cheese.  Bake an additional 10 minutes or until cheese is bubbly.

Serve enchiladas with homemade ranch (see previous post!), avocado, sour cream, greek yogurt, or your choice of sides.  Make it your own!  Add a cup of chopped chicken, use pepper jack instead of cheddar, leave out the cilantro if it's not your taste, or whatever.  That's the beauty of home-making it!

Tuesday, April 3, 2012

No-rinse Floor Cleaner

Another addition to my homemade spray-cleaning arsenal is no-rinse floor cleaner, and it's definitely one of my favorites.  I'd been using a Clorox ReadyMop, which I was pleased with.  I like the idea of getting a clean mopping pad each time instead of letting it sit in between uses (ask me about my fear of sponges sometime...although I might throw up in my mouth a little).

But you can use this no-rinse floor spray with any mop.  Refill your ReadyMop/Swiffer bottle with it, make a large quantity of it in a bucket or the sink to use with a traditional mop, or put it in a spray bottle to squirt on the floor with a reusable (washable) microfiber mop head.  (All of these options are available at Wal-Mart, Target, etc.)  One advantage of the spray bottle option is that it can be used just as easily for a spot-clean as it can to spray down the whole kitchen floor.

And it's so much less expensive than what I was buying to the tune of almost $4/bottle.  The home-made version ends up being just pennies a bottle...almost nothing for me since I always keep the ingredients on hand.  And that's another plus, you can always whip up a quick batch when you need some.  In fact,  that's how this came to be as I emptied my store-bought bottle on a kitchen full of muddy paw prints.

Want to try it for yourself?  Here's how to home-make it:

- 1 Tbs white vinegar
- 3 drops essential oil (any scent, I used tee tree oil)
- 32 oz hot tap water in a spray bottle
(You can also fill up your sink with hot water, add 1/3 cup vinegar and 8-10 drops essential oil.)

Then just spritz it on the floor as you go.  It dries relatively quickly, so I just squirted down one strip of tile at time.  If you come across a really dirty spot, you can always give it an extra squirt and let it sit while you do the next strip of floor.  Everything on my floor came off using this with my washable microfiber cloth mop.

You can smell the vinegar when you first spray it out, but that scent dissipates as soon as it dries leaving behind only the light essential oil scent.

And that's it!  No rinsing, no residue, no dirt...well, for a few minutes anyway!


Sunday, April 1, 2012

Spread 'Em! Chicken

As promised, here's the recipe for that yummy spread I talked about in my last post!  I've made this a few times now, and it never disappoints.  It's great because it's made with ingredients I almost always have on hand, takes about 5 minutes to prepare, and even tastes great as leftovers.

I've played around with several lower calorie options, finding that the higher calorie versions browned better in the oven (isn't that always the case?).  But the lower calorie ones still tasted amazing even though they didn't look quite as pretty.

*Here's a little disclaimer on all of my cooking recipes...I rarely measure anything, unless doing some precise baking.  "Eyeballing" it is usually the way I go.  So these measurements aren't meant to be exact...in fact, they're probably not exactly what I used!  Feel free to play around with the amounts and ingredients.  Oh, don't look so worried...it'll be fun!

Here's how to home-make the spread for your chicken:

- 1 cup Greek yogurt or sour cream
- 1/2 cup mayo (regular or reduced fat)
- 1/3 cup grated parmesan cheese (grate your own or the kind from the shaker is fine)
- 2 tsp dried parsely
- 1/2 tsp onion powder
- 1/2 tsp garlic powder
- salt and black pepper to taste

Combine everything in a small bowl, and stir until combined.  (These amounts made enough for me to spread over 2 very large chicken breasts, so make more if you're planning to serve a big group.)  Yep, that's it!  You can even make the spread a few days in advance and store it in the fridge.

When you're ready to cook your chicken, preheat your oven to 375'F.  Grab your frozen or thawed chicken breasts, and slather that spread all over the top.  Lay it on thick, at least a half-inch or so.  You'll be glad you did.

Now, pop the chicken on a foil-lined baking sheet (for easier clean-up later), and cook them until all the pieces are at least 165'F by meat thermometer and the topping is bubbling and brown.  Mine took about 45 minutes with frozen chicken.  (If you know chicken, that would usually be a long time, but don't worry too much about overcooking your birds...the spread keeps them nice and juicy!)

Here's the finished product of the lower-calorie version.  Yes, it's a bit splotchier than it's caloric counterpart, but still mmm-mmm good!  Besides, brown food is good food, right?

Saturday, March 31, 2012

Poultry Pounding Points

Have you ever noticed that you can buy a huge package of chicken breasts for way cheaper than a small package?  And those big packs go on sale a lot.  The problem come in that unless you have enough people to eat 5+ lbs. of poultry in one sitting, you may end up wasting more than you save.

Most of the time, I'm only cooking 2-3 chicken breasts at a time but hate to spend more money for less chicken by buying the small pack.  When I got my freezer, everything in my chicken world changed!  Now, when chicken breasts go on sale, I can stock up without worrying about waste.

Not to mention it's crazy convenient to cook with.  Since I pound it out flat before freezing individual portions, I can use as few or as many as I want.  I can put a few pieces in the fridge the night before to thaw, put them into the crockpot, or go directly from freezer to oven.  Gone are the days of wanting to make something homemade for dinner only to be without any meat (save some cans of tuna).

Here's 10 points on how to home-make your pounded poultry packets:

1) Buy: - I choose boneless, skinless breasts...best quality for lowest price.  (In my neck of the woods, I've found Sam's to be the best option for this.  You can get a HUGE package of chicken for about $10.)

2) Trim: Take the time before you freeze it to trim any extra fat or gross stuff off of your chicken.  I have to say this is probably my least favorite part of the process, but I'm always glad I did it after its over.  A pair of kitchen shears is super handy for this job, and much less messy than a knife.


3) Season: If you want to season your chicken before freezing, either with a little kosher salt or something more, this is the time.  This is completely optional, and I only do it sometimes.

*Tip: if you're going to thaw your chicken before cooking it, you'll have another chance to season it once it's thawed.  If you're going directly from freezer to oven, not much sticks to frozen chicken breasts.  You might get some seasoning on the outside layer, but the inside will be kind of bland.

4) Package: Place your chicken breasts inside resealable plastic freezer bags.  I usually put 1-3 pieces per quart-size freezer bag, but you can do whatever works best in your house.  Seal it up, leaving about an inch unzipped at one corner.

5) Pound: Now this is the fun part!  Grab a rolling pin, heavy skillet, or even an unopened can of beans and pound that poultry!  Flattening it out to about 1/2 inch or so will help it thaw/cook more quickly and evenly and will keep it from taking up extra room in your freezer.

6) Seal: Squeeze any extra air out of the bag, and finish zipping it up.

7) Label: Write what it is, any seasoning you added, and the date you froze it on the bag so you'll know what you're getting later.


8) Stack: Since you've pounded the pieces out flat, just stack them up one on top of the other.


9) Freeze: Pop the stack in your freezer.

10) Cook: Whenever you're ready to use them, just let them thaw in the freezer overnight or put them directly into the oven while frozen.  Cook them until they're 165'F inside.  Serve them with some cut up potatoes and herbs, plain to chop up over some rice or pasta, or coat them with some of the spread I'll share in my next post (It's sooo delicious!).

Friday, March 30, 2012

Simple and frugal raised beds

We always had a garden growing up.  When I was old enough, my mom gave me a little corner of the garden to take care of.  Watching those tiny seeds I planted turn into cucumbers was amazing!  And I think I may have been convinced to eat some things I had previously turned my nose up at.

Even now, gardening is still one of my favorite things about spring.  While growing your own produce is not difficult, it does require time and devotion.  But if you stick with it, you'll be rewarded with the fruits (or vegetables) of your labor.

Most of my yard is vary shaded, thanks to the 10+ enormous oak trees. (If anyone has a use for thousands and thousands of acorns, let me know, I've got you covered.)  There are few spots that get full sun for growing veggies, and most of them are not too big.  Last year, too much shade in combination with the searing summer heat left my garden somewhat lackluster.

So this year, I had the idea to plant some things in cement blocks in sunny spot in my yard.  Since these blocks are small and mobile, it seems to be a great solution.  Time will tell!

I did a little bit of research, gathered my supplies, and got my garden on yesterday afternoon.  The great thing about a cement block garden is that you can do it anywhere - no matter what type of soil or how little room you have.  Think of it as a simple and frugal miniature raised bed.

Here's how I home-made my own raised beds for sugar snap peas:
Preparing: Get yourself some cement blocks; select as few or as many as you need.  They're pretty cheap. Find them at Lowe's or other places with home/garden supplies.  Think about where your seeds will grow best, and muscle your blocks into place. Since I'm planting peas, I picked a sunny spot where they could trellis up the fence.
Soiling: Place a clean coffee filter in the bottom of each side of the block: To keep weeds from springing up underneath and and to prevent water from draining out too quickly.  Also cheap.  Fill up each hole with a potting soil/dirt/fertilizer of your choice.
Planting: I poked 2 holes with my thumb in each of the squares of the cement block.  (Spacing and planting depth depend on what you're going to grow - check your seed pack instruction.)  Drop a few seeds in each hole (usually 2-4).  Just cover them up with dirt,  give them a good water, and you're done!
Maintaining: sunshine, water, and waiting.  Can't wait to see (and eat!) what grows!
I'm even considering creating a square with some of the blocks, laying down a tarp and filling it up with soil for a larger raised bed.  Then, I can plant more in the cement blocks too.  I was a little worried that my yard might look a bit, um, "red-neck" with all of the blocks.  But now that I see it, it looks great - very clean and organized.  Just the way I like it!

Tuesday, March 27, 2012

Revive Your Rug

Are your rugs or carpet in need of revival?  With a 90-pound hairy beast running all over, mine were definitely in need of a face-lift.  I used to buy a special carpet powder for pets, but it was $3 a box and I went through it too quickly.  It was great at loosening fallen pet hair and removing the lingering doggy scent.

So, I looked for a way to make my own and found one that I couldn't be happier with.  Here's how to home-make it:

- baking soda (enough to fill your chosen container)
- 6-8 drops essential oil of your choice (I used lavender)

Pour the baking soda into you container, leaving enough room at the top to give it a good shake.  Drop in your essential oil and shake it up until it's well distributed.  Sprinkle liberally over the carpet.  Let it sit for at least 20 minutes while you do something else. (This give the baking soda time to absorb all the unwanted odors.)  I've let mine sit overnight before, and it did fine, but you can test on an inconspicuous area of your rug/carpet if you want.   Use it every time you vacuum or just whenever your rugs need an extra boost of freshness.

It's easiest if you put the carpet powder in a container that has a sprinkle lid (an clean parmesan cheese shaker works great).  But in true home-made style, I made my own (okay, honestly, it was because I didn't have an empty container).

If you are fresh out of parmesan shakers too, here's how to make your own "sprinkler":

- Put the lid and ring on an empty mason jar.
- Use your trusty hammer and a nail to pound as many holes into the lid as you want (the more holes, the more powder comes out with each shake).
- Label it and fill it up with the carpet powder.
- If you're going to store it, putting an old scrap of cloth or even some plastic wrap between the lid and the ring will help keep the essential oils from evaporating.

Happy carpet cleaning!

Monday, March 26, 2012

Healthier Ranch Dressing

In an attempt to find healthier, fresher food options, one thing I don't eat much anymore is ranch dressing. Now, I love me some ranch...on salad, french fries, even pizza.  No matter how you pour it, dip it, dunk it...I love it.  But that delicious, store-bought ranch boasts 70 calories/Tbs and has a not-so-delicious list of ingredients.  And the "light" ranch seems to be rather light on taste, in my opinion.

Looking for a better choice, I stumbled upon a variation of this recipe claiming to be high-protein ranch.  With a few tweaks, here's what I came up with...a thick, creamy ranch with only 28 calories/Tbs and a healthy dollop of protein-power to boot!

Here's how to home-make it:

- 1 cup low-fat cottage cheese
- 4 tsp ranch powder
- 1/2 cup (divided) non-fat buttermilk (can sub skim milk or even water for less calories)

Dump the cottage cheese, ranch powder, and half of the buttermilk into your blender, and puree it up.  If your blend has one of those handy removable spouts in the lid, stream in however much more buttermilk you need to get it to the consistency you want.  (I wanted mine runny enough to be used as a salad dressing but thick enough to still be creamy so I used the full 1/2 cup of buttermilk.)  Puree it all until it's nice and smooth.

Add it to an air-tight storage container and pop it in the fridge.  It will keeps as long as the use-by dates on your cottage cheese and buttermilk containers.

It really tastes yummy and has that thick, creamy, cheesy quality that ranch dressing should.  If I had it on a salad and didn't know it was homemade, I really don't think I could tell the difference except that it tastes fresher.  And it's about 60% fewer calories than the store bought stuff that would cost about 60% more.  Sold!

Friday, March 23, 2012

Polish Your Salad

Next up in the spray-cleaning arsenal is wood polish.  Love this stuff.  It made my house smell great and gives my wood a, well, "polished" glow!  Seems like it really sinks into the wood and moisturizes it more than just a dusting spray would.

Here's how to home-make it:

- 4 Tbs lemon juice (fresh squeezed or from a bottle)
- 2 tsp olive oil (doesn't have to be the expensive kind)
- 3 Tbs water

Shake all the ingredients up in a spray bottle and get spritzing!  This is one cleaner you will want to make a small batch every time rather than a full bottle.  Since it has lemon juice in it, it should be used within 24 hours.  The good news is, if you don't use it all, you can always spritz it over your salad!

Wednesday, March 21, 2012

Nose Prints

This is Wilson -- my ever-devoted, ball-fetching, fence-jumping doggy.  If he's not outside chasing rabbits or sleeping on my bed, this is one of his favorite places to be -- sitting a the front door watching the world go by and protecting me from vicious mailmen that might stroll past.

While I must say that his watchdog perch does keep him entertained for a while and allows me to get something done without having him underfoot, it has one nasty drawback: nose prints.  If you look closely at the aside photo, you can see his snotty schmear all over my front door.  Ick.

Another thing about Wilson is that he has an irrational love of soap -- not really of being bathed with it, more of eating it.  He can't wait to lick up soap suds or slap his slimy tongue on a freshly cleaned window.  Maybe it's just his unquenchable desire to have everything smell like him.

This soap-fettish lead to a problem: after I'd clean the front door glass...lick.  Game over.  It's like he's drawn to anything clean, trying to get it back to its "normal" state.  Also, I didn't really want him lapping up windex as I'm sure it's not the healthiest snack.

So next in my cleaning arsenal came glass cleaning spray, and it couldn't be easier to make.  And I don't care as much if Wilson takes a lick of this stuff.  Works great for little one's grubby fingerprints too!  And it couldn't be easier to make.

Here's how to home-make some glass cleaning spray (aka "nose-print neutralizer"):

- 1/4 cup white vinegar
- water

Pour the vinegar into a 32-oz spray bottle, and fill up the rest with tap water.  Give it a little shake and start cleaning!  Buff it off with something that doesn't leave little lint flecks behind, like a microfiber cloth or even newspaper for extra shine.

You can smell the vinegar when you first spray it, but the scent dissipates completely in a couple of minutes leaving behind nothing but sparkling windows and mirrors..  Nose prints neutralized...for now.

Tuesday, March 20, 2012

Freezing Seasonal Fruits

About a year ago, my dad's friend was getting rid of a large chest freezer and asked me if I'd like it.  I answered a hearty yes and asked when we could come pick it up.  I was so excited, I took her a loaf of banana nut bread as a thank you since she refused to let me pay for it.

But that excitement was fast-fleeting when I came face to face with my "new" freezer.  Combing through cobwebs, I got my first glimpse of the grimy, putrid box sitting in her shed. When a family of cockroaches crawled out from underneath, I was ready to pack up and go home. We'd brought a tape measure along to make sure it would fit in my pantry, and I was secretly half-hoping that it just wasn't going to work out for me and my freezer with its little family.

Now, I'm so glad that my dad made me look past the nasty exterior (which has now been oh so thoroughly scrubbed and sanitized) to the treasure chest within.  I use something from my freezer almost daily now and am not sure how I got along without it.  It definitely keeps me from wasting leftovers that I've eaten one too many times as I can just pop it into the freezer to enjoy another time.

But one of my favorite things to store in my freezer is fresh seasonal fruits.  I can stock up on my favorites when they're at their peak and enjoy them all year long.  It's also much more cost effective to chop up your own produce to use in smoothies, dishes, baked goods, etc.  And the quality is so much better.

I recently found a goldmine of kiwis and got them freezer-ready. They're so yummy in smoothies, and it only took me long enough to peel and slice them to do it.

 Here's how to freeze some your own fresh produce using my kiwis as an example:

1) When at peak ripeness, peel and slice the kiwis.  You can make them as thick or thin as you want.  I cut each of my kiwis into about 10 slices.
2) Line a metal baking sheet with wax paper and lay the kiwis out in a single layer.  Feel free to layer up with more wax paper and kiwis.
3) Lay the baking sheet in the freezer, and let them harden for 24 hours.
4) Pluck your kiwi frisbees off of the wax paper and put them in a resealable plastic freezer bag.  Label the bag for date/contents.
5) Take them out to use at your leisure.

I've never let a kiwi thaw back out, so I'm not sure if the texture would hold up or not.  But for smoothies and such, couldn't be better.  You could even use them as ice cubes in fruity drinks or float them in a bowl of punch at a baby shower for a pretty accent. Great for cool summer treats on a hot day too instead of a sugary popsicle.  Try this with other sliceable fruits like strawberries, pineapple, bananas, peaches, etc. to stock up your fruity freezer.

Monday, March 19, 2012

All-purpose Cleaning Spray

Whoever decided white would be a good color for kitchen cabinets probably didn't do much cooking.  I have a wall and a half of white cabinets in my kitchen, and they show every little splatter of this and spill of that.  When they're clean, the kitchen looks clean; when they're dirty, the whole kitchen looks a mess even if there is not a dirty dish in site.

I've tried several cleaning sprays, and some of them have worked pretty well.  But there was this one persistent stain that, I'm sorry to say, had been there for almost 2 years.  (It's been so long that I'm honestly not sure what it originally was.)  Nothing seemed to get it off.  I've squirted, sprayed, scrubbed, and even tried scratching it off.  Still there.

When I made my own all-purpose cleaning spray, I knew the true test would be the spray vs. THE stain.  I adjusted the spray trigger and gave it my best shot.  While I squirted down a couple of other cabinets, I let it sit on the stain and came back to it a couple of minutes later with my trusty paper towel.

Skeptically, I raised the towel and wiped.  GONE!!!  The 2-year stain was gone!

Hope renewed, I finished wiping down the rest of the cabinets to reveal my once-white kitchen again.  Looks like a whole new place.  And the all-purpose spray has found a new home in my cleaning caddy.


Here's how to home-make the all-purpose cleaning spray for your kitchen and bathroom:

- 1 tsp Dawn dish soap (the original blue kind works best)
- 1 tsp baking soda
- 2 Tbs vinegar

Combine the ingredients in a 32-oz empty spray bottle, and fill the rest with hot tap water.  Rotate gently to combine.  (Try not to shake it so that the Dawn doesn't get to sudsy!)

Don't forget to label it, so that everyone knows what it is!  I write the ingredients on the bottle too, so I can easily make more.

Happy cleaning!


Saturday, March 17, 2012

My Spray-cleaning Arsenal

Do you ever wonder what's in your everyday cleaning sprays?  I've noticed that most of them don't have ingredients listed on the bottle.  However, the fact that I start coughing and sputtering if I get to close to my squirt and the fact that many of them say something like, "For Use in a Well-Ventilated Area," makes me a bit wary.

To be honest, I'd never really worried too much about my sputtering until one time when my niece (we'll call her LA) was over for the weekend.  She was playing with her xylophone on the living room floor.  You know, the one that plays the same 2 songs over and over and over and over again until you can hear them in your sleep and find yourself singing them a sort of inopportune times -- like while waiting in the check-out line at Kroger?

Anyway, I was about to start spraying away at the dust and grime that had accumulated over the last several days, when I stopped short to the tune of "I'm a monkey...OOoo, AAaa, EEee."

Wait, I can't spray this stuff while LA's in here.  So I took to the dry cloth method, but think I did more harm than good as my dust simply went from the furniture to the floor where she was crawling around.  Needed to think of a better solution for LA's next visit.

Next time I was at the store, I went hunting for green cleaning sprays.  Yikes, those things are expensive!  While LA is definitely worth it, I decided to look into making my own before I spent the money for her next birthday present on furniture polish.

Hello, pinterest!  There are a lot of great homemade cleaning supplies recipes here.  So, over the next few posts, I'm planning to share with you those I've tweaked and tried in my home.  So far I've made an all-purpose spray (great for everything from kitchen cabinets to bathroom counters), glass-cleaning spray, wood furniture polish, and no-rinse floor cleaner.


Now I don't have to be nervous about giving the house a good scrub-down while LA is around.  Minus some empty spray bottles (you can buy a bag of 6, 32-oz bottles for less than $6 at Sam's), here's everything in my homemade cleaning-spray arsenal:

L to R (skipping brown bottles): olive oil (doesn't need to be the good kind but this was all I had), white vinegar, baking soda, dawn dish soap (the original blue kind works best), and lemon juice
The two small brown bottles are essential oils...they're not "essential" to the recipes but do add a nice fragrance and some even have antibacterial benefits.  I order mine online from here, and they seem to last forever.  (The two I use most often are lavender oil and tea tree oil, buy you can choose whatever scent you like best.)

Coming up next: all-purpose cleaning spray!

Friday, March 16, 2012

Foaming Hand Soap

If you coupon, you can really make this soap for next to nothing!  (Even if you don't, it's still so much cheaper than buying the pre-made stuff.)  I wait until the little bottles of scented hand soap go on sale for buy one get one free, stack on a coupon, and stock up on a few bottles.

Another great thing about making your own is that you have a lot more scent/type variations.  Do you like watermelon-scented?  Anti-bacterial?  A certain color to match your decor?  No problem!  You can make this foaming version with any clear liquid hand soap.

Here's all you need to home-make it:

- foaming hand soap dispenser (empty)
- 1/8 cup clear liquid hand soap (any variety)

Pour the liquid hand soap into the empty foaming bottle.  (You want to fill it up just over 1/8 of the volume whatever container you put it in, so adjust your amount of soap if needed.)  Then, SLOWLY fill the rest of the foaming bottle with water.  (I let mine run down the inside of the container instead of letting it drop directly on the soap to prevent too much sudsing.)

When full, put the lid/squirter back on the foaming soap bottle and GENTLY rotate it around until the soap is thoroughly mixed.  (Try to avoid shaking it to avoid aforementioned sudsing.)

That's it...you're done!  Generally, I can get at least 3 bottles of foaming hand soap out of a small bottle of regular liquid hand soap.  Money well saved!

Wednesday, March 14, 2012

Screamer (i.e. skinny coffee creamer)

I like a little coffee with my creamer.  You know, diluted to the point that it looks more like a mug of milk than a cup of coffee.

Enter, guilt.  Using my store-bought coffee creamer, I could easy consume at least 200 calories in my morning cup o' joe.  Even just drinking one cup per day, I could go through a bottle within 2 weeks.  Gets hard on the pocket book too...that stuff is not cheap, but it is addictive.

So, I started looking for homemade coffee creamer recipes online.  However, while most of them did have better ingredients, I still wasn't finding something "skinny" enough for my cup of cream (I mean coffee).  This led to the invention of "Screamer," or skinny coffee creamer.

Let me hear you, "I scream, you scream, we all scream for coffee cream!"

Best of all, it's only 3 ingredients.  And they can all be kept for quite a while in the fridge or pantry.  Unlike my abysmal dismay when I opened the fridge in the morning only to remember that I meant to get some more creamer at Kroger yesterday, if I run out, I just pour the ingredients into a bottle, shake it up, and I'm ready to go.

Want to home-make it yourself?  Here's how!

- 14 oz fat free sweetened condensed milk
- 16 oz unsweetened vanilla almond milk (can substitute with skim milk for only a few more calories)
- optional flavorings: seeds from 1/4 of a vanilla bean (my favorite...the flavor is amazing, and a little goes a long way), vanilla extract, cinnamon, sugar-free coffee syrups, cocoa powder, etc.

Pour it all into whatever container you want and shake it up.  It keeps in the fridge for about 2 weeks.  Give it a good shake each morning before you indulge to redistribute all the goodness!

These are the proportions I use for mine.  If you want it a little thicker, just use a little less milk.  Using the above recipe, my creamer is only about 35 calories/oz (the store stuff was double that).  Yes!!!

Screamer.  Good stuff.

Introducing the Homemade Maid

I love homemade things!  They make me happy.  Something about rolling up my sleeves and doing it myself is really rewarding.

And there's the frugal factor...i.e. I'm cheap.  I've found that most (not all) foods or products I make at home are less expensive than what I can buy in the store.  And, on those occasions where the cost is more, I find it well worth it.

Not to mention that you know what's in what you've made.  If you take a second to read a label, be it on a bottle of window cleaner or that yummy jar of pesto, you might be a little dismayed at what you find.  (Not that all those ingredients I'm not quite sure how to pronounce are bad, but I just don't know.  Better minds than mine can devote themselves to the research of Sorbitan Monostearate and such...better safe than sorry in my book!)

I've been making some greener cleaning recipes, and to my surprise, all my homemade cleaning products have given me better results that the ones I paid and arm and leg for at the store (even with my coupons).

As for food, I'm a self-admitting foodie.  I should probably join Foodies-Anonymous.  I'm not much on overly-processed and pre-packaged stuff.  (Although I must admit that on those hectic days, they sometimes find their way into my lunchbox.)

Given the choice, anything that I can make myself be it peach jam, fish sticks, or ranch dressing always tastes better to me.  Now I know, maybe it does or maybe it doesn't. But, I think I simply enjoy it more because I made it with my own two hands (and sometimes my trusty KitchenAid mixer!).

So for my enjoyment (and hopefully yours), I present The Homemade Maid...how I help make my home fresh, fun, and frugal!